So you got the lead and the person is interested in speaking with you. Now what?
Ask a professional how they do their meetings, and you will be able to determine how professional they really are. The greatest sales reps hold themselves accountable to numbers, are diligently interested in perfecting their craft and are organised.
So in this article, we will look into how you can organise yourself to get a high close rate using a system created in Trello as the main example. We will look at five simple stages—incoming lead, problem, solution, implementation and rejection—which you can use to help improve your close rate. In the end, you should have a clear idea of how you can organise yourself to maximise your close rate.
Let’s get into it.
INCOMING!!!!
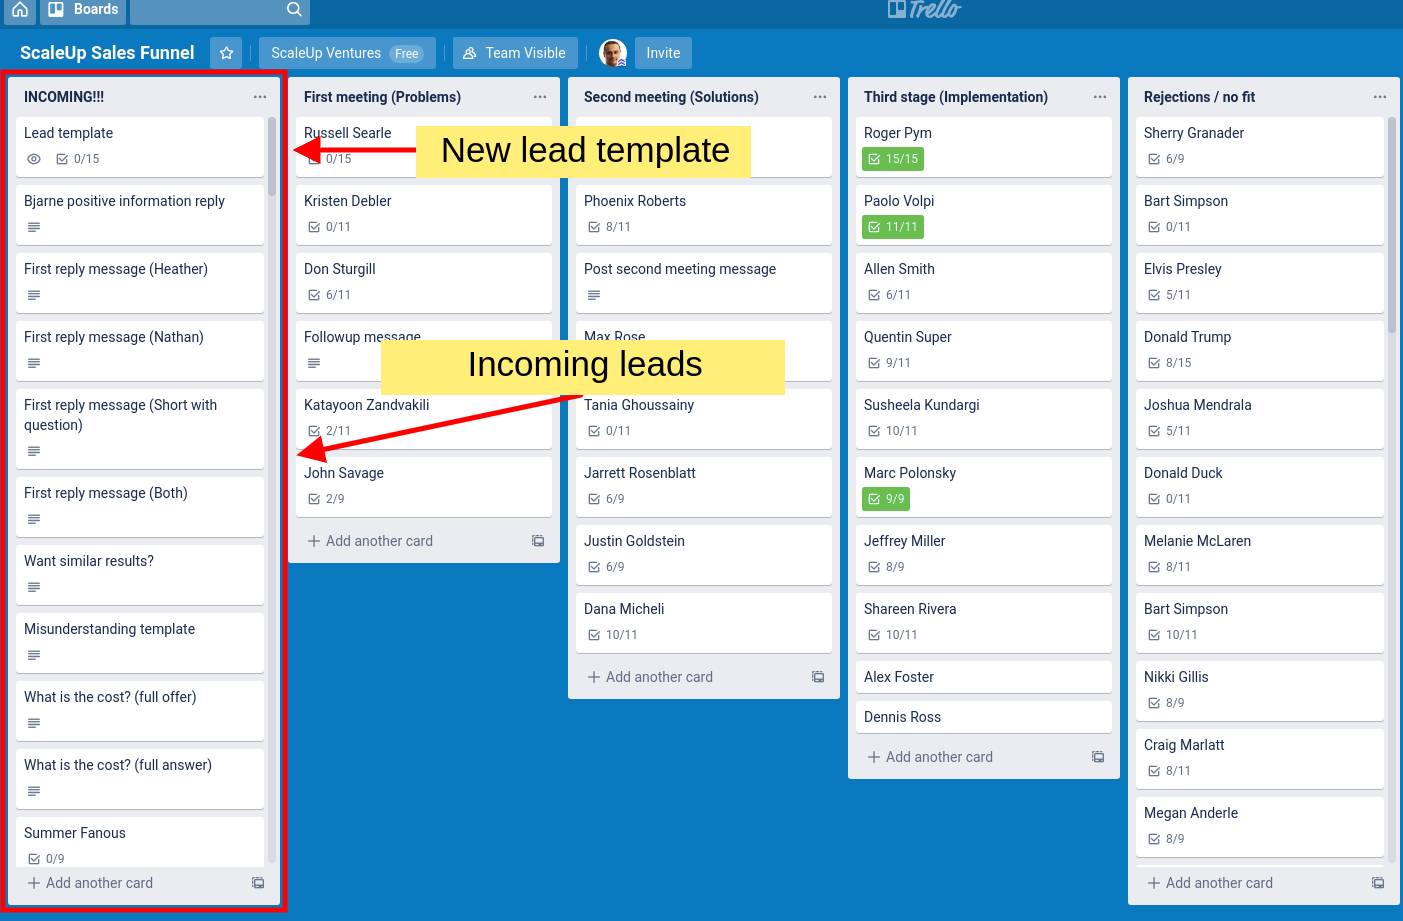
The first thing you have to plan is how to deal with incoming inquiries. Ideally, you should have a series of steps you can take each person through. This could be both a vetting and a nurturing process because you only want the right people to go through to the next stage.
That way you are not wasting your time, and you’re being considerate of the other person’s situation.
In this example, there is a lead template on top of the first column that can be copied and applied to any new incoming leads. In this template, the following tasks are listed for incoming leads:

Notice the percentage status bar on top indicating how many of the items on the list have been done. In this example, the procedure is sharing a booking link, getting the prospect to book a meeting (maybe through a lot of interaction), inviting the prospect to connect on LinkedIn (if not done so already) and creating a client mindmap to research the prospect.
Once all this is done, the prospect is moved to the next stage in the process.
First meeting (Problem)
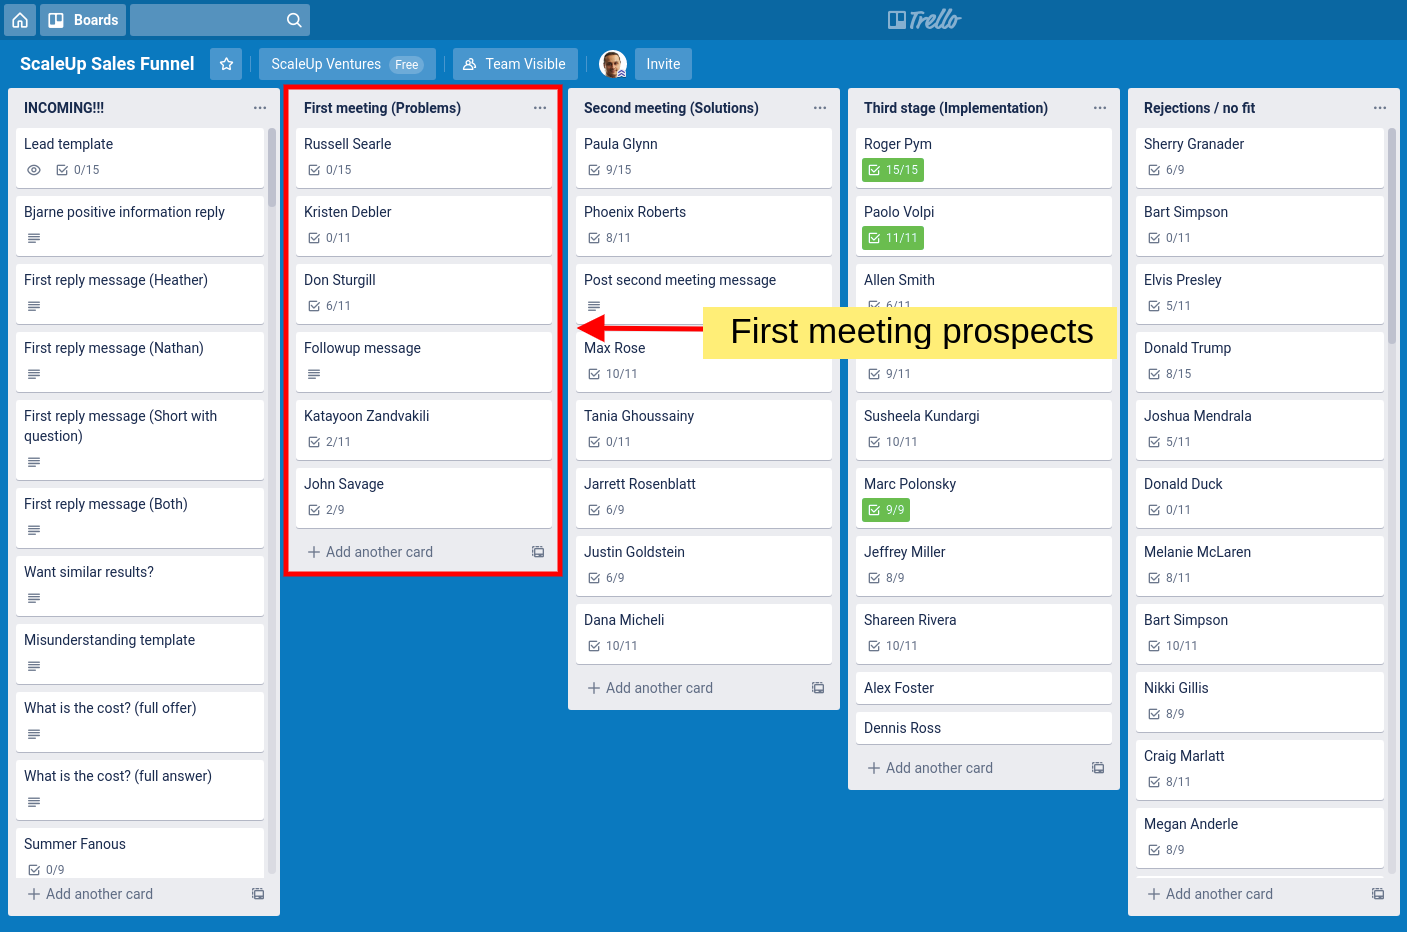
It is important to come prepared for the first meeting, yet at the same time, you should expect the unexpected. That is because you do not know the prospective client’s situation and whether you can actually help them.
Therefore, in the first meeting, it is important to come to the table with an investigative mindset. You need to identify three things: what is their current situation, where do they want to go and can you help them get there.
In this example, the following tasks are listed for the first meeting:
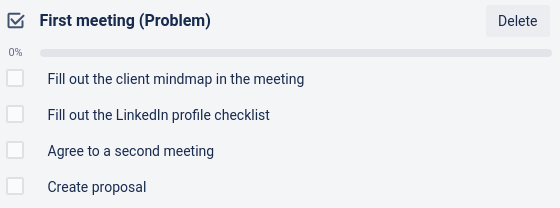
Here the client mindmap is filled out in the first meeting to get an understanding of the prospect’s situation and to find out if there is a fit between you and the prospect. You will also apply a checklist to the prospect’s LinkedIn profile to identify potential problems. Then there are options for agreeing to a second meeting and for creating a proposal.
Once all this is done, the prospect is moved to the next stage in the process.
Second meeting (Solution)
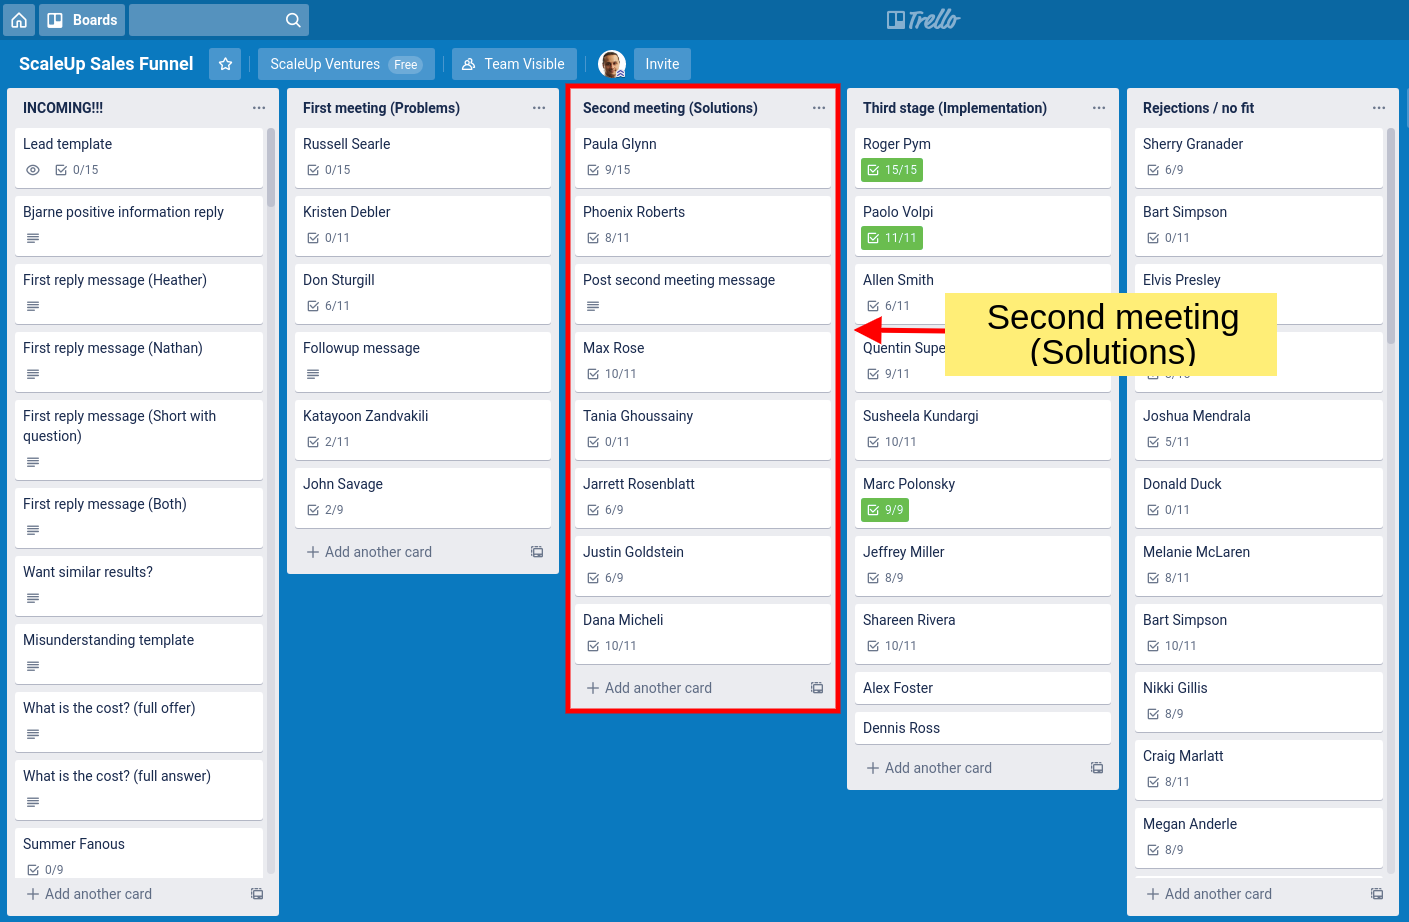
The second meeting is all about coming back to the prospect with a solution to what was discussed in the first meeting. This is where you will get a payoff for being an active listener.
To increase your close rate, you can start your second meeting by confirming and clarifying your understanding of the prospect’s situation. You will typically do this by reiterating what you perceive the issues to be and asking any questions you might still have. Then you can begin to go over your solution. Ideally, your plan (and you) should be flexible enough so you can tweak the proposal on the spot to better suit the prospect’s needs.
In this example, in the lead template the following tasks are listed for the second meeting:
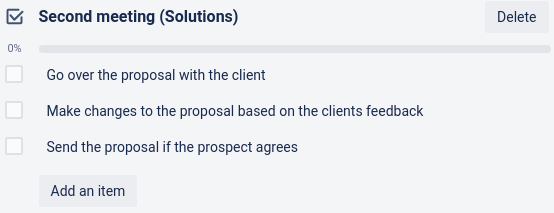
Here we see that the proposal is reviewed with the client and changes are made in real time. This is important because a prospect will be more interested in continuing if they had an active hand in creating, or at least adjusting, the solution.
Also, it is worth noting that the proposal is only sent if the prospect agrees to receive it. This is a soft yes to increase the final close rate. Ideally, we are aiming at a close rate of higher than 30%.
Once all this is done, the prospect is moved to the next stage in the process.
Third stage (Implementation)
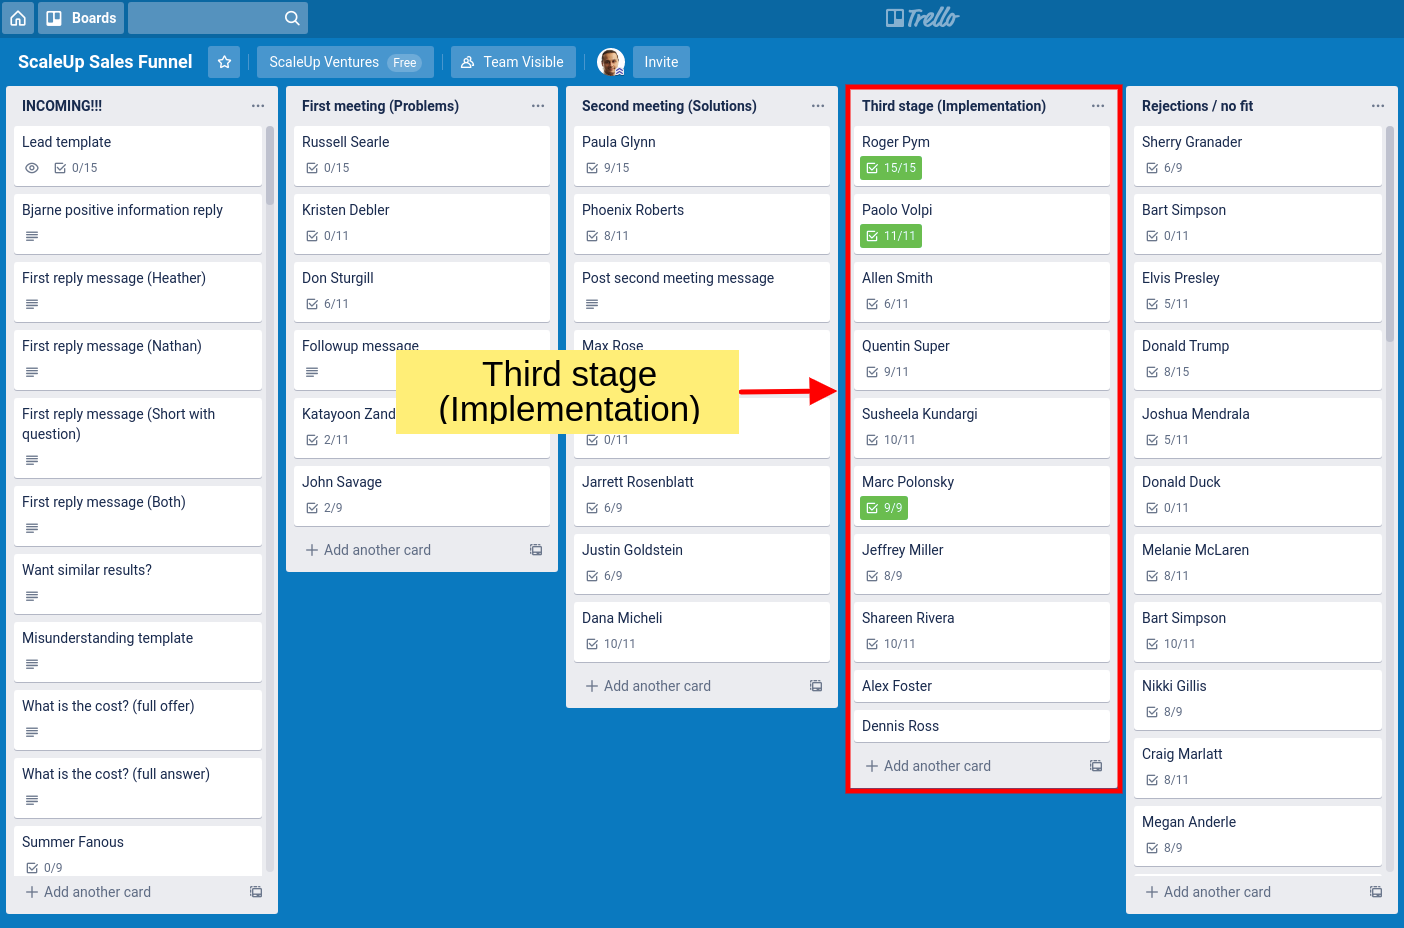
The third stage is all about getting started with the work. Now the prospect has become a client. This is where you can include onboarding steps for clients as well as setup. Ideally, this should be systemised to reduce any problems in delivering.
In this example, the following tasks are listed for the third stage of implementation:
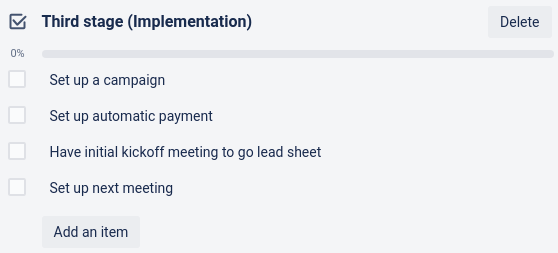
Here we see that there are steps for the setup of the campaign and for payment. There is also an initial meeting to go over a lead sheet and to agree to the next meeting.
Please note: These are only steps for initial implementation, not ongoing implementation. For that, you might like to have another board for delivering to existing clients.
Rejection/no fit
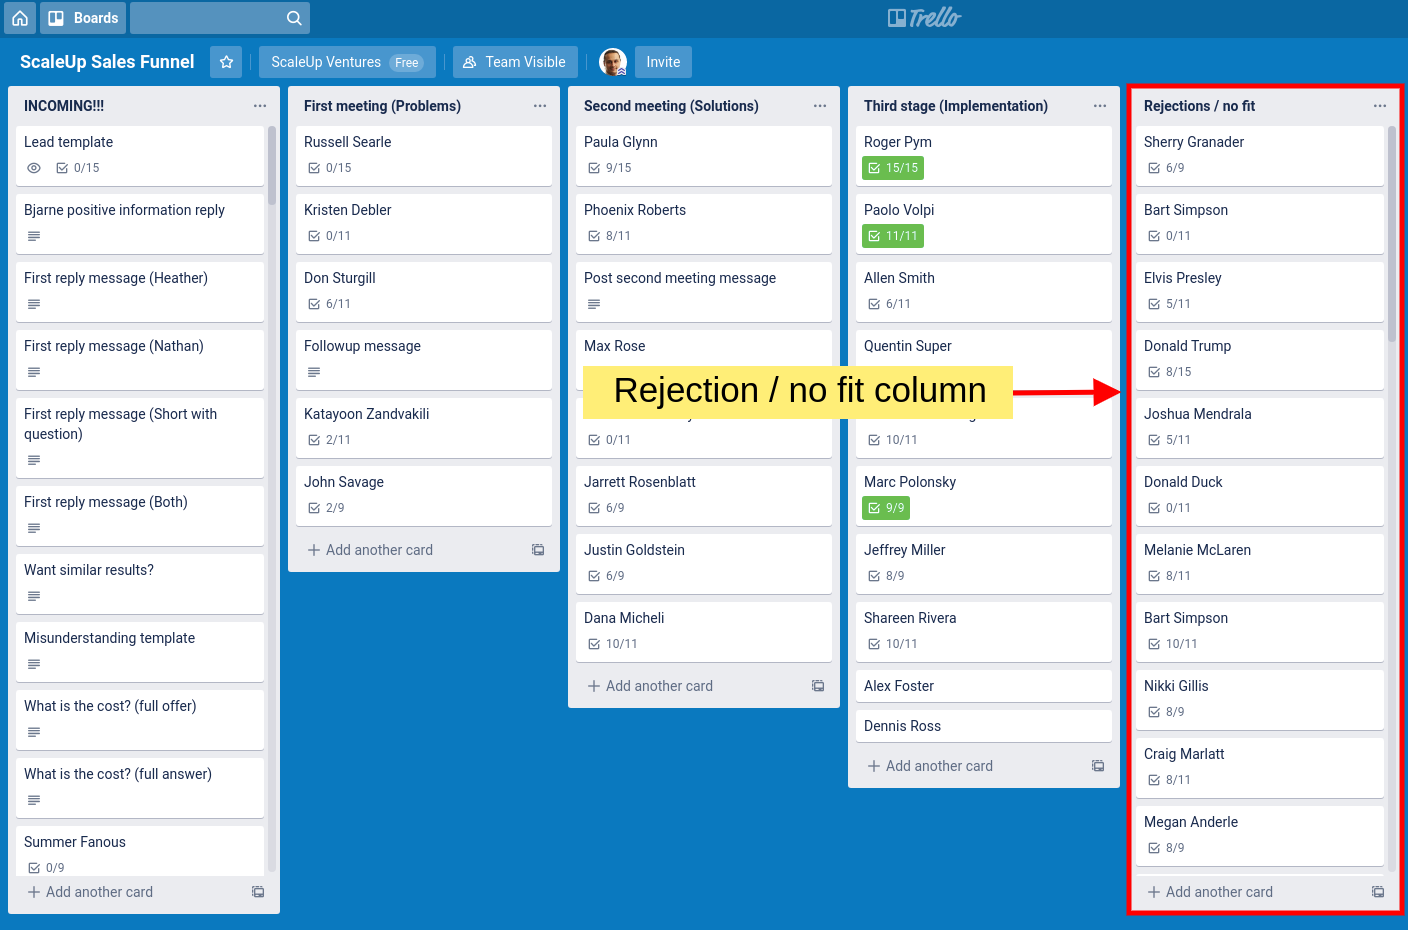
The final column is for any person who, anywhere throughout the process, rejects any advances or who has been identified as not being a good fit for the company’s offer.
In the first stage of incoming leads, a person can be rejected if they have no real interest in doing business. In the meeting stage, a person can be rejected if there is no clear identifiable problem that you can solve. In the solution stage, you can be rejected if the client does not believe you have a good solution to their problem.
Regardless of what the reason might be, the lead ends up in the final rejection pile.
Action items
Now you know the steps of a sales system, it’s time to act.
- Break down the steps in your sales process. Which main steps do you take customers through before they sign on and become customers of yours? Ideally, aim for no more than five main steps.
- Create a lead template with checklists for each step. Each step must have a set of checklist items, so you know when the prospect can be moved to the next stage. Brainstorm what to include or simply put in what you are currently doing.
- Start using your system. Your system will not be perfect to start with. However, it can drastically improve if you are willing to change it as you use it. You might want to change steps or checklists items for each step. Let feedback and other data drive your decisions.
Final thoughts
In this article, we laid out a sales system using Trello. There are other solutions out there that can do as good a job, if not better, and provide more integration options. However, the main benefit of Trello is that it is free and an easy starting point for you to set up your systems.
Depending on your circumstances, you might want to look into other sales management solutions that better suit your requirements.